
Building A Vulnerability Scanner Using OpenVAS & Kali
Running regular vulnerability scans against your devices is important for your organization’s ongoing security, but can be useful to assess your personal devices.
However, vulnerability scanning licenses, for many tools can be expensive and for individuals and small businesses, it is not always possible to invest the necessary funds into a professionally licensed scanning tool.
Setting up a vulnerability scanner, using OpenVAS & Kali Linux offers a vulnerability scanning solution, which can be set up with limited resources or knowledge, while also providing broad coverage of the CVE Vulnerability database.
To conduct any vulnerability scanning, or setup your own solution, contact our team or review any further information available here.
Considerations for Using OpenVAS
Setting up an OpenVAS scanner does require a slightly more manual and technical approach than an alternative tool such as Tenable Nessus.
A comparison of the two tools is provided here, if determining which option may work best for your organization.
If you are only looking to conduct vulnerability scanning of a small number of devices, Nessus Essentials may be a simpler alternative to use which can cover up to 16 of your devices.
A guide on setting up your first Nessus scan can be found here if this is a preferred option.
Resources For Getting Started
For setting up OpenVAS without having to invest in dedicated equipment or software, we can use a virtual desktop solution to first install the Kali operating system, and then install OpenVAS within Kali.
The following resources can be used for the initial setup process:
- Download Virtual Machine software using, VirtualBox, VMware Player, or Fusion,
- Download the Kali Linux operating system, to configure as a virtual machine,
- The Kali FAQ and links to community forums if any issues are encountered,
- The VMware/Broadcom community forums if any issues are encountered,
- The OpenVAS FAQ and links to community forums if any issues are encountered,
For this tutorial, VMware Fusion is used for the complete setup process, although the walkthrough will largely apply to any virtual desktop solution.
Installing A Virtual Desktop
For VMware software, you will need to create an account with Broadcom. Once this is created you should have access to the download pages, where both Player and Fusion can be found. VirtualBox downloads can be found on the downloads page, here.
After installation for player or fusion, you can choose the option to create a new Virtual Machine, which should provide the following interface.

Installing Kali Linux
To download Kali Linux, you can navigate to the downloads page at the following location.
For most situations, you can select the Installer Images as your download option. The specific version you then download will depend on your device and whether you need a 32-bit, 64-bit, or an ARM version if using a Mac with Apple Silicon.
Each download option should provide you with a download file a few GB in size, with a .iso extension.
Create The Kali Linux Virtual Machine
Once downloaded drag the .iso into the VMware prompt, which should display the file, and then click continue.
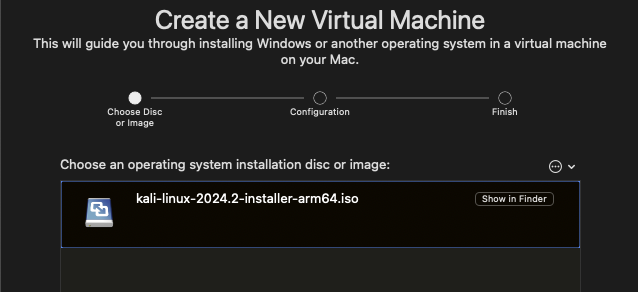
The next prompt asks for the specific operating system to be clarified. Kali isn’t presented as a specific option within this list, so just selecting “Other Linux” will be a suitable option before clicking continue.
The next prompt will ask you to finish, however, it’s recommended to select customize settings, this option will allow you to update the memory that is allocated to your virtual machine, as well as a range of other settings.
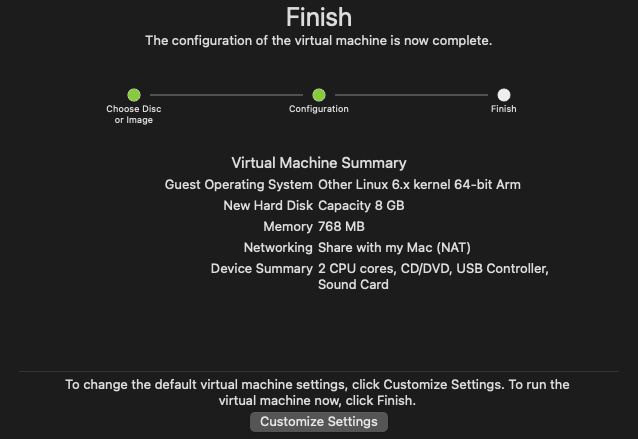
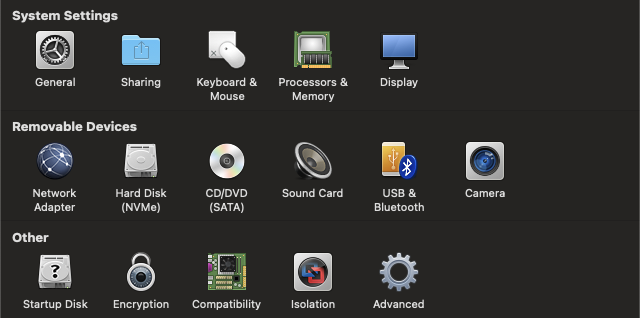
After selecting customize settings, and choosing a name to save your virtual machine as, you should be presented with the following set of configuration options.
Updating Your RAM Settings
Selecting processors and memory will allow you to update the RAM to be allocated for the virtual device. The exact amount you allocate will depend on your device, but as the virtual device is intended for running vulnerability scans, the more you can allocate the better, but should ideally be a few GB as a minimum.
Updating Your Hard Disk Settings
Selecting the Hard Disk option from your configuration panel is also important to increase the amount of storage memory.
The default is often to allocate 8GB, however, as the virtual device will need to download and install the OpenVAS plugins, as well as store vulnerability scanning information over time, allocating more memory is recommended, but with 20-30GB as a minimum.
Updating Your Network Adaptor Settings
Depending upon your specific setup, you may also want to change your network adaptor information. This can allow you to create a virtual device with its own IP Address on your network, which can be useful for remote accessibility later on.
Starting The Kali Virtual Machine
Once you have finished updating your settings, you can select the play button on the virtual machine prompt that appeared or, select the Virtual Machine and Start-Up options to launch the operating system. Kali will then open up with the following prompt.
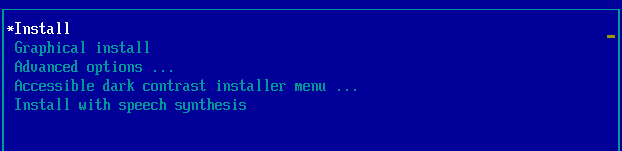
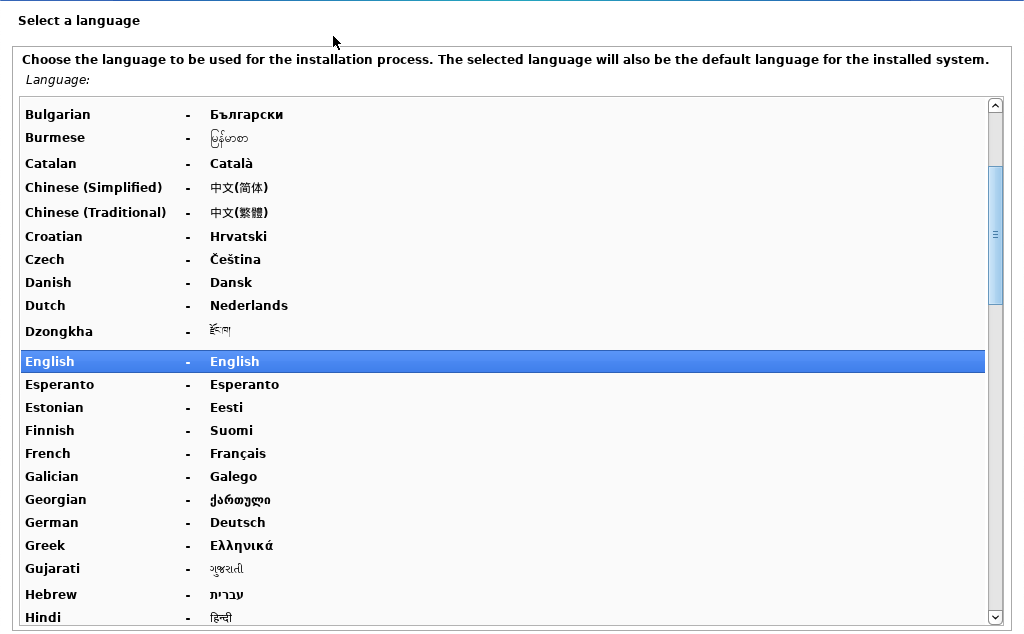
For this example, use the arrow keys to navigate to Graphical Install and hit return for this option. This option presents several pages to navigate through, to select your personal language and region preferences.
Configure Your Virtual Machine
- After these initial options and a short automatic setup process, a further set of options is presented to configure a device name, username, and password.
- You can select any preferred names for these options, although it is recommended to follow secure password guidelines for your password selection.
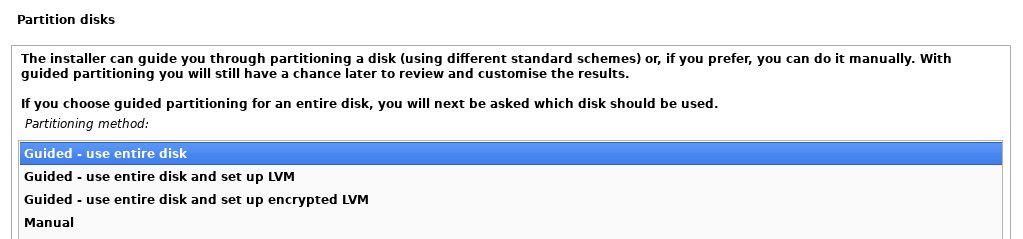
- A further automatic installation process will then be presented, before an option for how to install the operating system.
- The default option available here for “use entire disk” is suitable, as the virtual device only has one purpose, for vulnerability scanning.
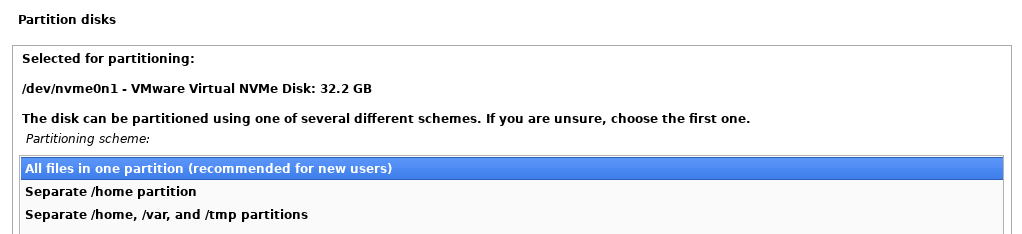
- A further prompt will be presented to confirm you are using the entire hard disk space, and this can also be confirmed.
- Another option for how to partition your hard disk will also be presented.
- The default option for “All files in one partition” will also be suitable for our purposes.
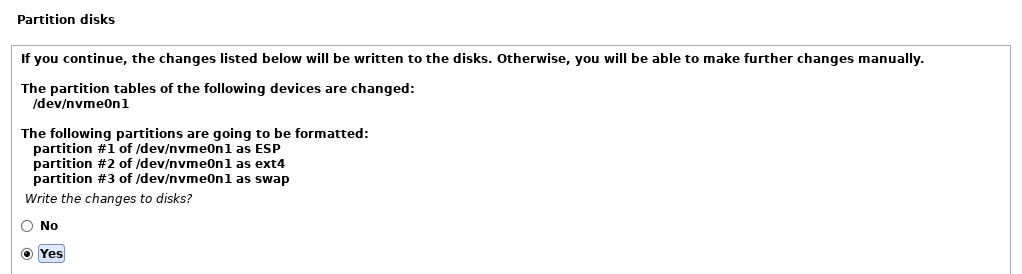
- A confirmation will be presented to finish your disk partition and write the changes to the disk.
- This can also be confirmed to continue with the installation.
- A final confirmation will then be presented, where you can select “Yes” to verify you want to write the changes to disk and proceed.
After this confirmation, an automated installation process will then begin installing Kali.
Configure Your Virtual Machine Software
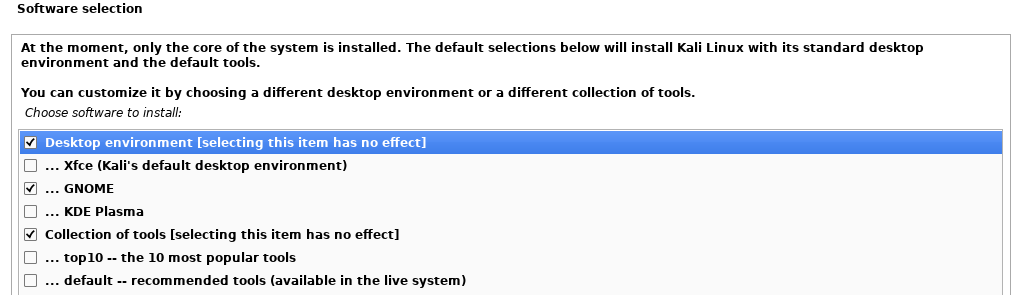
A software selection set of options will then be presented after a short installation process. This provides some choices to automatically install some tools and software that may be useful for various purposes.
As the virtual device is designed specifically for OpenVAS, it will likely not be useful for our purposes and instead consume disk space.
An issue often encountered when installing Kali using the default options is that the installation can fail part way through the process. To avoid this potential error and have a simpler installation the following options, shown below, can be selected to install Kali.
After a further automated installation process, you should see the following installation complete message.

Launching The Kali Linux Virtual Machine
After selecting “Continue” Kali should automatically start up and present the username you configured during the installation.
- After selecting the username and entering your password, the Kali desktop will then be presented.
- On occasion the start-up process for Kali may not complete correctly, resulting in either a black screen or a frozen display.
- Selecting the Virtual Machine and Restart options within your VMware software will force a reboot for your virtual device, which will often resolve this issue.
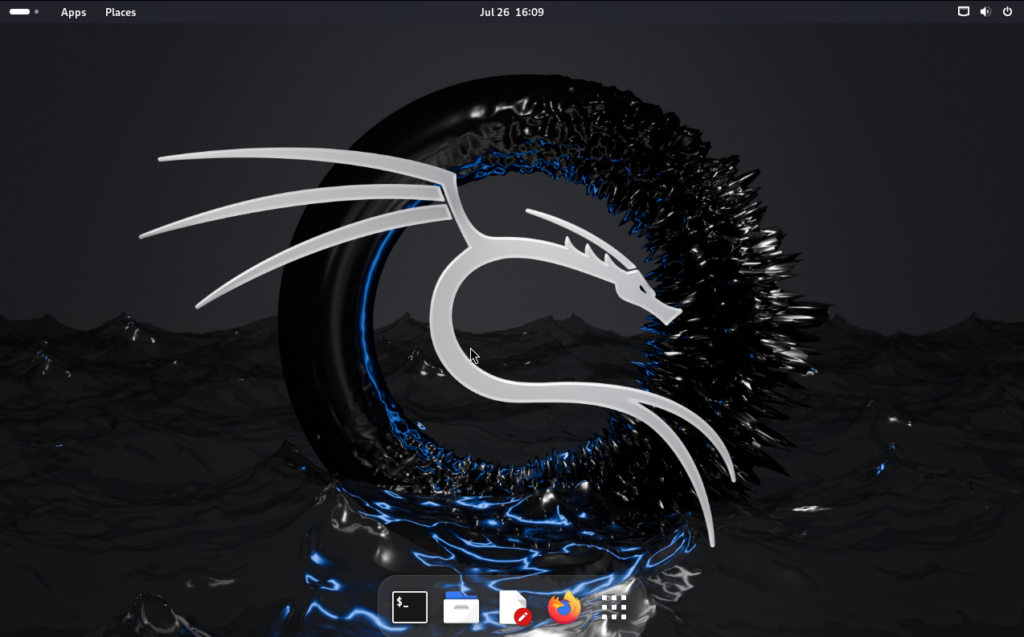
- Once successfully started, you should be presented with the Kali desktop, as shown below.
Installing OpenVAS
With Kali successfully installed and running, it’s time to install OpenVAS.
To start the setup process, select the terminal icon at the bottom of the Kali Desktop to be presented with a terminal interface.

Update Your Kali Linux VM
The Kali operating system will likely need to have some updates applied after its initial installation. Before installing OpenVAS or any other software type the following command, and hit enter, to update your Kali operating system.
sudo apt updateYou will be presented with a password prompt as you are running a command with the “sudo” option.
Enter the password you created during the VM setup process and hit return to continue, keeping in mind that password characters will not be displayed as you are typing them out.
After the updates have been completed you may see a message stating that packages can be upgraded.

The next command will then upgrade the available packages.
sudo apt upgradeYou may be presented with a confirmation screen for languages and regions during the installation, in which case you can confirm your languages of choice before continuing.
OpenVas Setup And Installation
After your upgrades have finished a further command can then be run to install OpenVAS and all of its required packages:
sudo apt install openvasAfter the installation has been completed, a setup process for OpenVAS needs to be run, using the following command. This can take some time to complete.
sudo gvm-setupOnce completed a set of messages should be displayed stating that a username and password have been created for OpenVAS.
As a test, setup commands can be used to confirm that OpenVas has been installed correctly without any issues:
sudo gvm-check-setupThis should produce a series of messages stating that everything is OK, with a final message such as the following:

Change Your OpenVAS Password
OpenVAS will be created with an existing user under the name of “admin”. To reset the admin password for your instance of OpenVAS, the following command below can be used. This will update the admin user within the OpenVAS PostgreSQL database:
sudo -u _gvm gvmd --user=admin --new-password=YourNewPasswordEnable OpenVAS Remote Access
By default, OpenVAS runs locally within the Kali Linux operating system. However, there can often be a requirement to enable remote access, for other users to access the web interface. Making OpenVAS services accessible outside of Kali can therefore be useful.
Within the Kali terminal, enter the following command. This will open a text editor for one of the configuration files for OpenVAS.
sudo nano /usr/lib/systemd/system/greenbone-security-assistant.serviceWithin the text file which is displayed in the terminal, a line will be shown as the following:
ExecStart=/usr/sbin/gsad --foreground --listen 127.0.0.1 --port 9392Using the arrow keys, navigate to this line and then across to “127.0.0.1”. This can be deleted and replaced with either the IP Address of the Kali operating system or “0.0.0.0”, which will make OpenVAS accessible on all available network interfaces that Kali is using, as shown below:
ExecStart=/usr/sbin/gsad --foreground --listen 0.0.0.0 --port 9392Exit and save your changes, by pressing “CTRL” and “X”, and then pressing “Y” and hitting enter, when prompted to save your changes.
You can then restart your OpenVAS services using the following commands.
sudo gvm-stop

sudo gvm-start
If you need to restart Kali and start the OpenVAS processes again at any point, “sudo gvm-start” can also be used:
Setup OpenVAS Vulnerability Scans
The web interface for OpenVAS can be accessed by opening the Firefox browser and using the following address, however, after completing the initial setup it should open automatically:
https://localhost:9392/As OpenVAS is running locally on our Kali device, the web interface can be accessed using the address “localhost” or “127.0.0.1”.
If you have other devices that need to access the web interface and you have updated OpenVAS to enable access remotely, you can access the web interface via your VM’s IP Address or hostname.
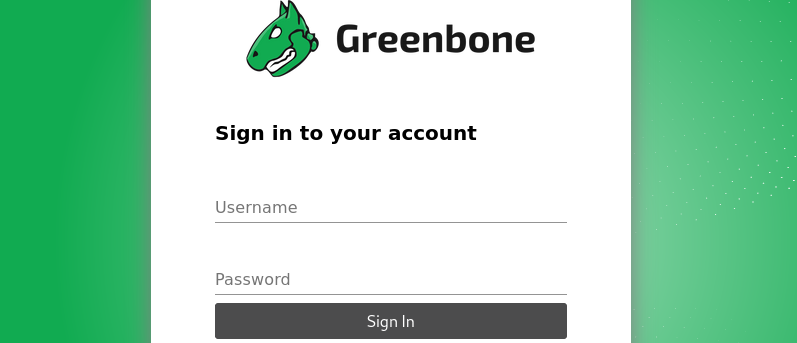
OpenVAS presents the following web interface, where you can enter the login details that were created during the initial setup process:
After logging into the OpenVAS web interface, we can begin to run some network vulnerability tests and configure OpenVAS with our specific information such as defining a set of devices that will be included in a vulnerability scan.
- Navigate to the Configuration tab and select Targets,
- Then select the “New Target” option in the top left corner of the page.
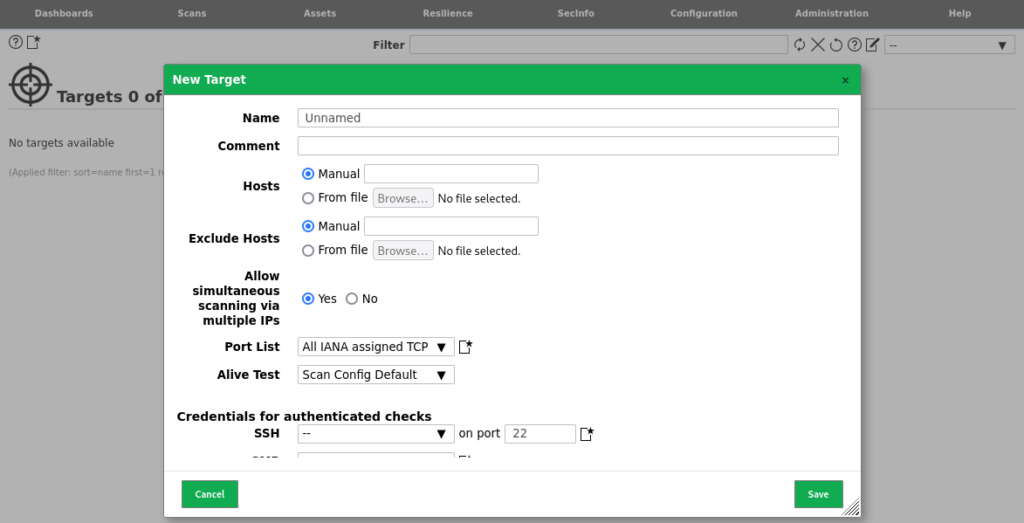
- The IP Address of your device can then be entered into the Hosts section, and you can define a name for your target device.
- Alternatively, you can define a Hostname, IP Address range, or upload a file with a large number of hosts for your scan to incorporate all of your devices.
- This can be completed multiple times to add a different set of targets for different scans.
- After defining your target devices select the Scans tab, and the “Tasks” option, then select “New Task” in the top left corner of the screen.
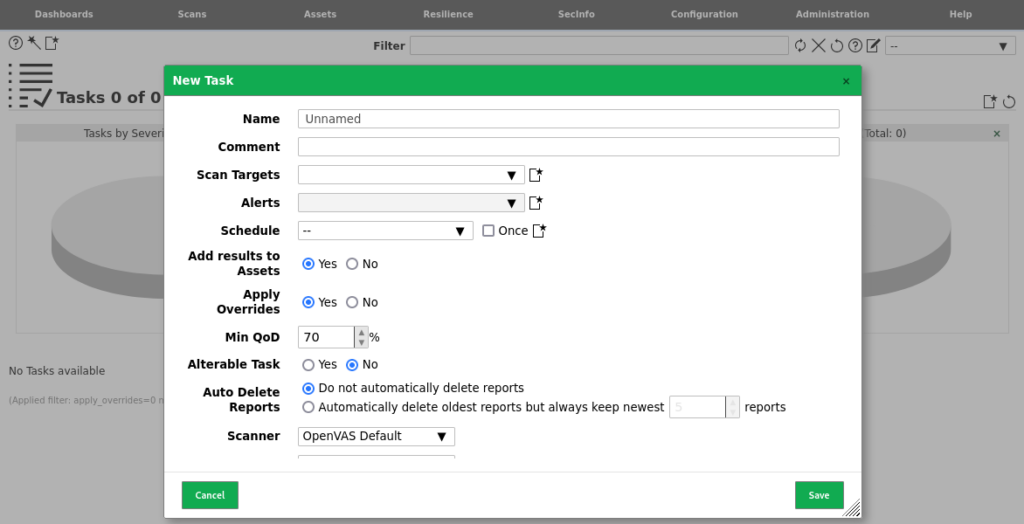
- When selecting the drop-down option for “Scan Targets” you should see the different targets that you have defined, which can now be selected to define your vulnerability scan.
- After providing a name for your vulnerability scan, you can save your first scan profile and the created scan will appear.
- Selecting the play icon on the right-hand side of the created scan will launch the vulnerability scanner.
Configure Credentials For Your Scans
It is possible to configure OpenVAS to use credentials for its vulnerability scans.
Authenticated scans can be useful, as they typically identify more vulnerabilities within the installed software and the configuration of a device, as opposed to unauthenticated scans.
- Select the Configuration Tab at the top of the page and then choose the Credentials option.
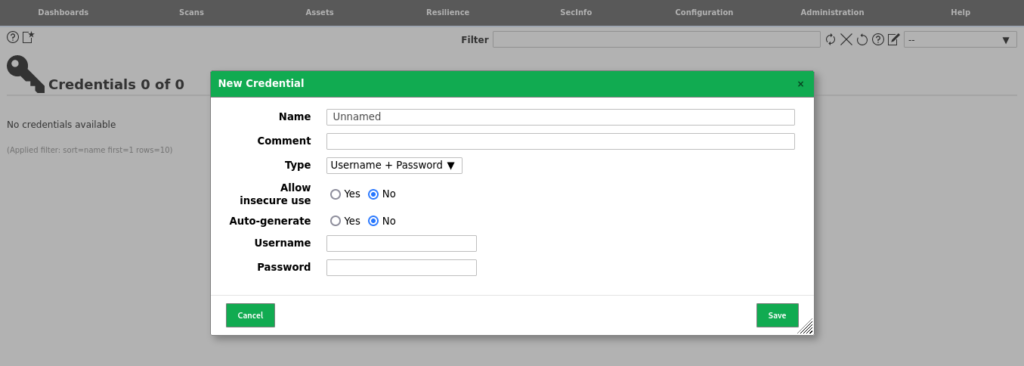
- In the top left corner of the page, you can choose to add “New Credential”.
- Within the interface that appears you can then enter a username, password and provide a name for your set of credentials.
- After saving your defined credentials, you can then go back to your created Targets, under the Configuration tab.
- You can create a new target, or choose the edit option on the right of your existing targets.
- Within the target interface page, there is a section for “Credentials for authenticated checks”.
- In this section, you can use the drop-down option to select the credentials you have created. Your credentials can be used for SSH, SMB, ESXi, and SNMP authentication.
After saving your defined target with your selected credentials, these credentials will then be used in an attempt to log in to your devices when running vulnerability scans.
Setup Scheduled Vulnerability Scans
As part of the configuration process for the vulnerability scans, a Schedule can be defined to allow automated and continuous scans to be run against your assets.
- Under the Configuration tab at the top of the page, you can select “Schedules”, and then use the option within the top left corner of the page to create a “New Schedule”.
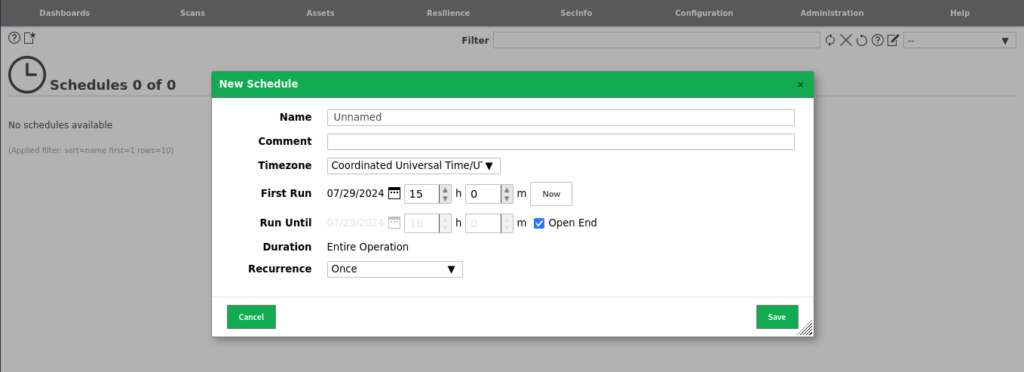
- Within the schedule interface that appears, define a name for your schedule and then you can configure a time and date to begin your scan, and an end date if your scans only need to be configured for a limited run.
- You can also use the “Recurrence” option to define how often the vulnerability scans should run, which could be daily, weekly, or monthly depending on your devices and preferences.
- After saving your schedule, you can then navigate to your defined scans, or edit your existing scans and use the “Schedule” drop-down options to add your new schedule to a scan.
Exporting Vulnerability Results
Where you need your vulnerability information for reports, or to forward the information to other team members within your organization, OpenVAS allows for vulnerability reports to be generated.
- Within the Scans page, you will have one or several scans which are listed as “Done.”
- Selecting the scan date, listed under “Last Report” you can review the scan information for the scan that has just been completed.
- Within this interface you can use the provided tabs, to review information for your identified hosts, open ports, and vulnerabilities.
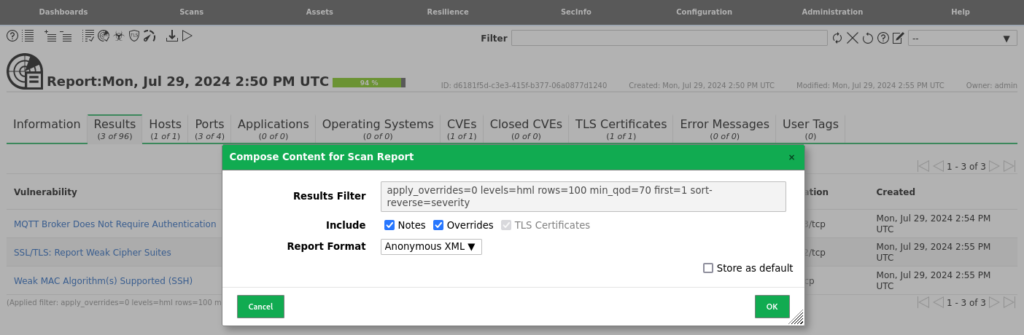
- At the top of the page, an arrow icon will provide an option for “Download filtered Report”.
- Selecting this option provides an interface where you can select your report format. This can be CSV, PDF, TXT, or XML.
- PDF or CSV may be more useful for an initial review of your devices and vulnerabilities. Selecting “Ok” will download your report, and allow you to review or share the vulnerability data.
Creating a New User
OpenVAS allows for the creation of multiple user accounts with different permissions, which can be useful for allowing multiple users direct access to OpenVAS, but limiting their ability to create new scans.
- Navigating to the Administration tab and selecting the “Users” option will display the current user accounts for OpenVAS.
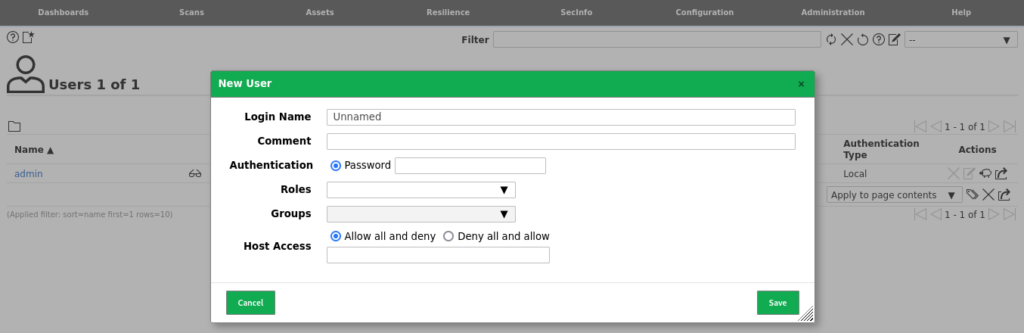
- Select the “New User” option within the top left of the page to enter the user creation interface.
- The interface presents options to set a username or login name
- The new Password can be entered under the Authentication option
- The type of user can be defined under Role, with multiple default options available for the user role.
- The information can then be saved to create your new user.
New user roles can be created under the Roles section of the Administration tab, if you need to add custom roles for any of your user accounts.
Changing Your OpenVAS Password Policy
When OpenVAS is first installed, it has a default configuration with no password policy, which allows for the creation of weak passwords for your user accounts.
As you may choose to create multiple accounts and setup remote access to your OpenVAS web interface, it is worth updating the policy to ensure secure passwords are in use.
From the Kali terminal interface access the OpenVAS password policy using the following:
sudo nano /etc/gvm/pwpolicy.confUse the arrow keys to scroll down through the description until the following text:
############################
# This is an example file where all lines are explicitly prefixed with
Each line in this file is prefixed with a “#” and by removing the “#” the password policy can be updated to define rules that will be enabled for creating new passwords.
For example, the line that contains the following can have the “#” removed to enable a policy rule where passwords must be at least 8 characters long.
#!/^.{8,}$/The example policy file describes the different lines in the file and their purpose related to password rules. This allows a customized password policy to be created.
Common passwords can also be blocked such as “password” and a range of additional instructions can be enabled which allow the policy to be defined in line with your organization’s security standards.
Prioritize Your Vulnerability Results
Vulnerability prioritization is important for any organization. Where you manage a small number of assets there may only be a small number of vulnerabilities, however as your organization and assets grow, likely, the number of vulnerabilities to address across a range of devices will also increase.
Some vulnerabilities can be considered more critical than others, and depending on the impacted devices you may need to decide where to focus your remediation efforts.
An in-depth post on the factors to consider for vulnerability prioritization is provided here.
Building a Vulnerability Management Program
Vulnerability scanning and vulnerability prioritization both form part of a process referred to as Vulnerability management.
Vulnerability management covers a range of factors, such as identifying your high-priority assets, verifying the results of your vulnerability scans, and the management of the remediation actions for your devices.
Similar to vulnerability prioritization, as your organization grows, vulnerability management will become an important factor in managing your scans and devices.
A more detailed post related to the vulnerability management process is provided here.
Conclusion

Regular Vulnerability scanning is important for any organization to maintain its security and forms part of a layered security strategy which includes other actions such as:
- Completing A Risk Assessment
- Applying Security Best Practices
- Carrying Out Security Audits & Penetration Tests
Although there are many alternative vulnerability scanning solutions, including licensed products, for any organization that has limited time or resources available, free solutions, such as OpenVAS are available.
OpenVAS can be used as an initial vulnerability scanning tool, allowing you to set up a scanning solution to run on an automated schedule.
You can then take some time to review your scan results each week and apply any necessary security fixes to maintain your organization’s security.
Where you have any further questions regarding different cybersecurity solutions, our consultants are available to address any concerns you may have.